Creating Your First Feed
Making our first feed
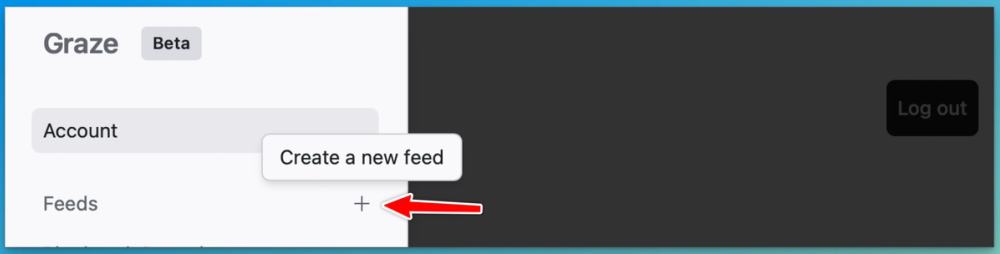
Let’s make our first feed. In your Graze dashboard, click the plus button to create a new feed:
You'll get the option to choose how you want to start out with making a feed:
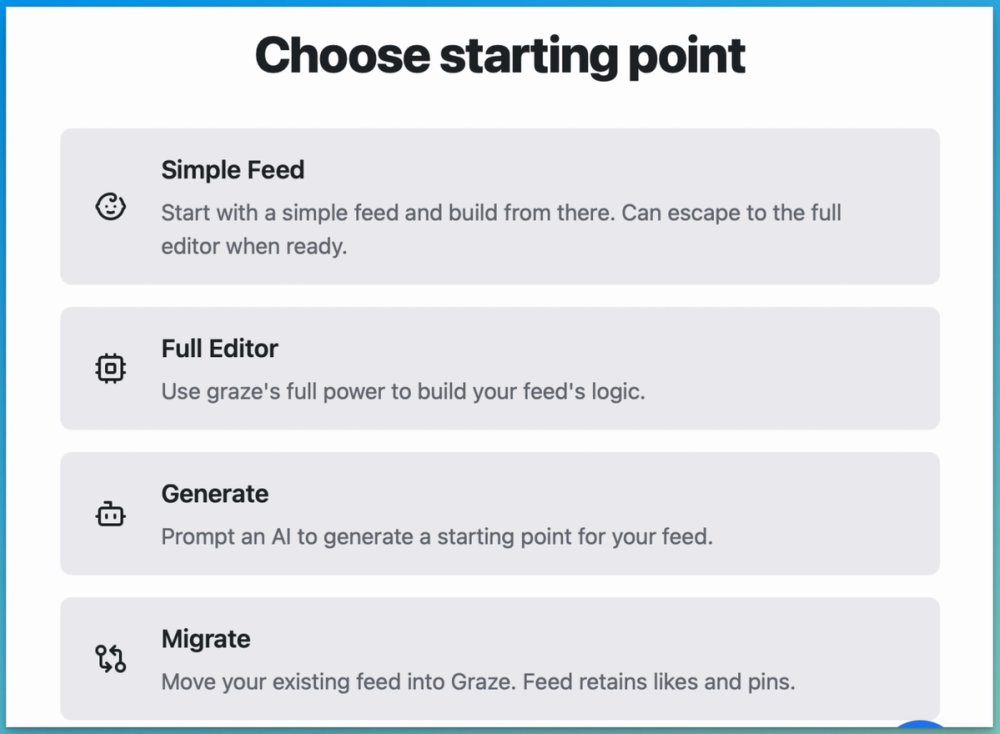
We’re going to make a feed about my favourite disaster hockey team, the Pittsburgh Penguins. Let's click on Simple Feed while we learn our way around. At this stage, all we need to worry about is the Feed Title, and the Feed Description.
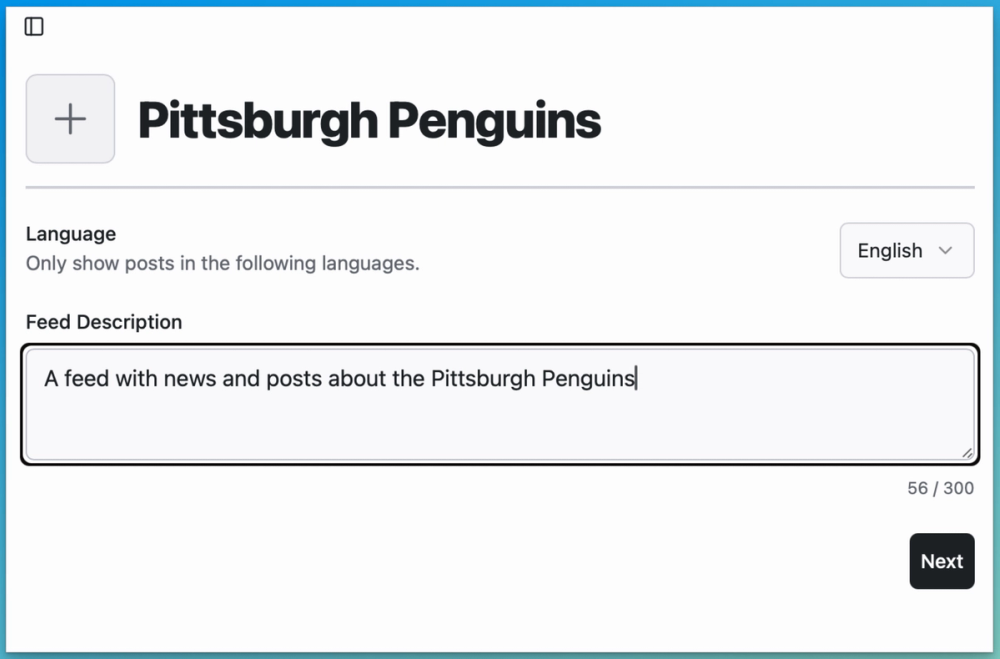
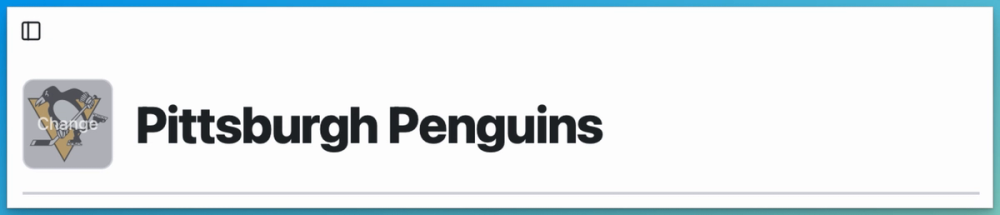
We can also hit that plus button at the top beside the title and give our feed a cute avatar, which users will see on Bluesky.
Now we’re ready to get started. It’s time to hit the Next button.
Constructing our feed
Next up we start to include our “logic” – First off, the instructions that tell our feed what to include:
I want to capture all posts that mention certain words, so I can make a list of the obvious ones: the team name and the captain’s name:

Believe it or not, that’s enough for a feed!!
If we go ahead and hit the Preview button on the next screen, we'll be able to see how it looks. Graze’s magic workers will go away and fetch the feed matching these instructions.
Important: sometimes the Graze workers are a little tired -- you need to be patient and they'll get to it, I promise!
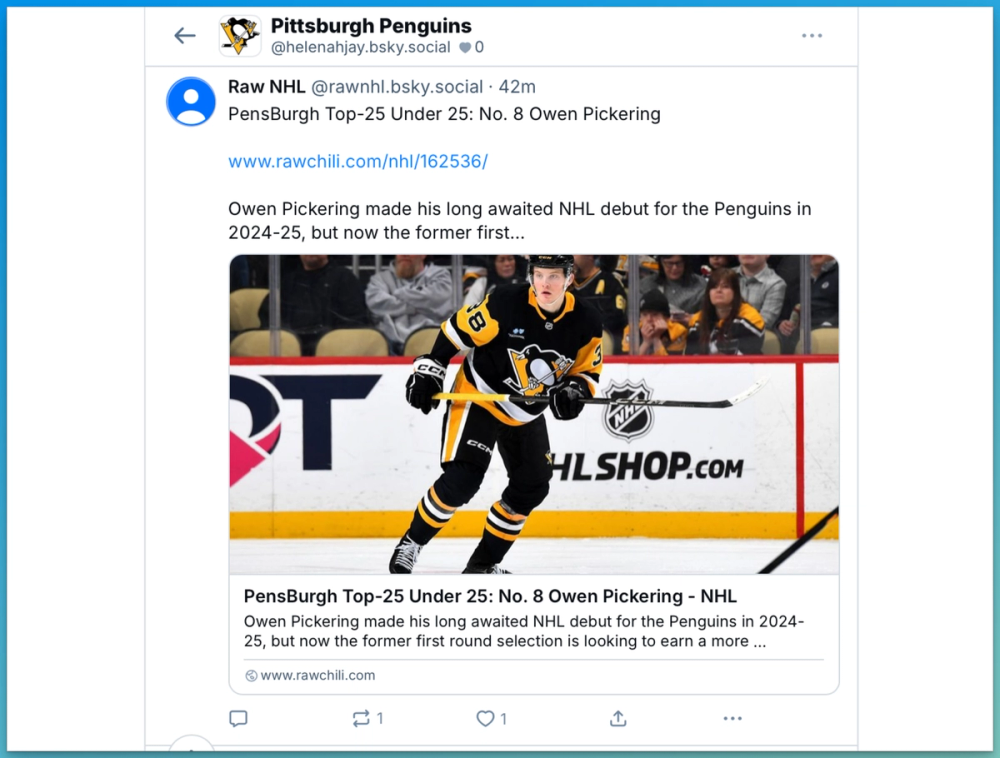
Looking good so far!! Except, our list was a little generic, so it’s also catching posts about actual penguins:
So we can scroll back up and select some words to exclude:
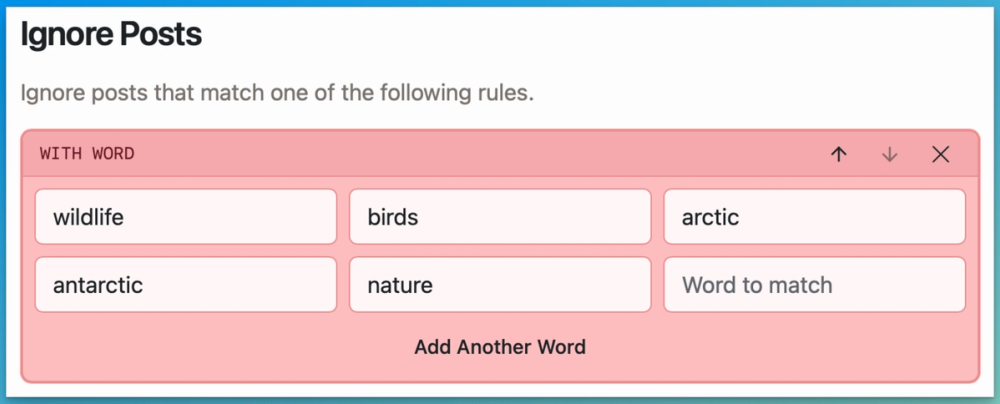
So now we're going to catch posts that include the words we want, only when they're also excluding the words we don't.
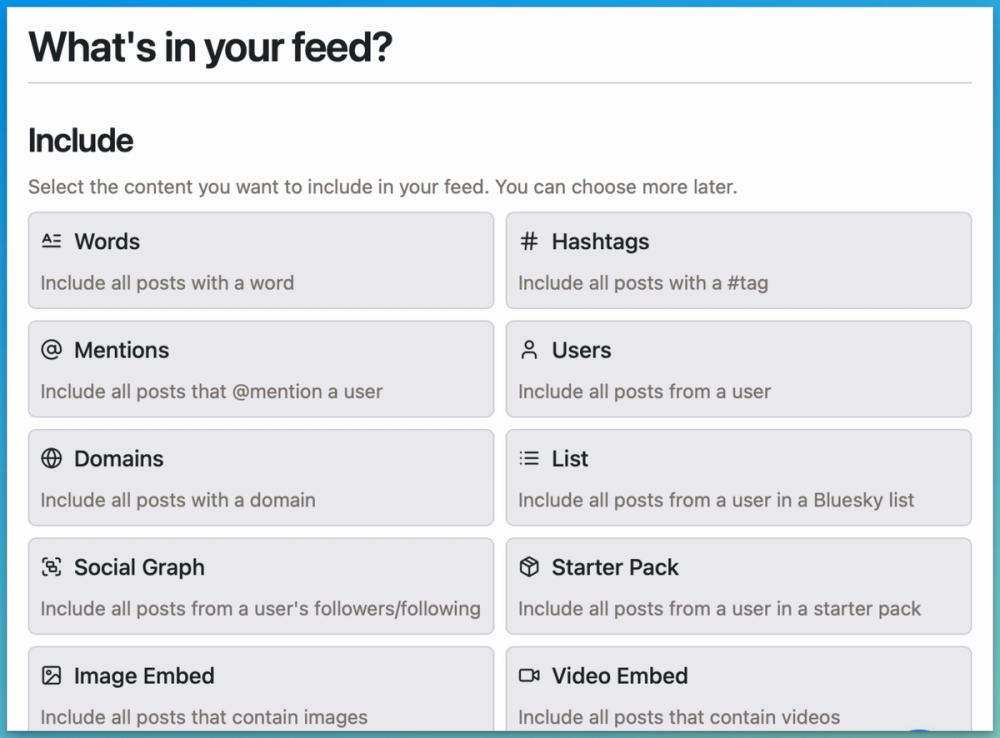
More Rules!
You can add as many Rules as you like!
For example, we can pick up specific hashtags, specific users, and we can say we only want posts in certain languages. We might want all posts from certain lists, or only posts that have videos or images attached:
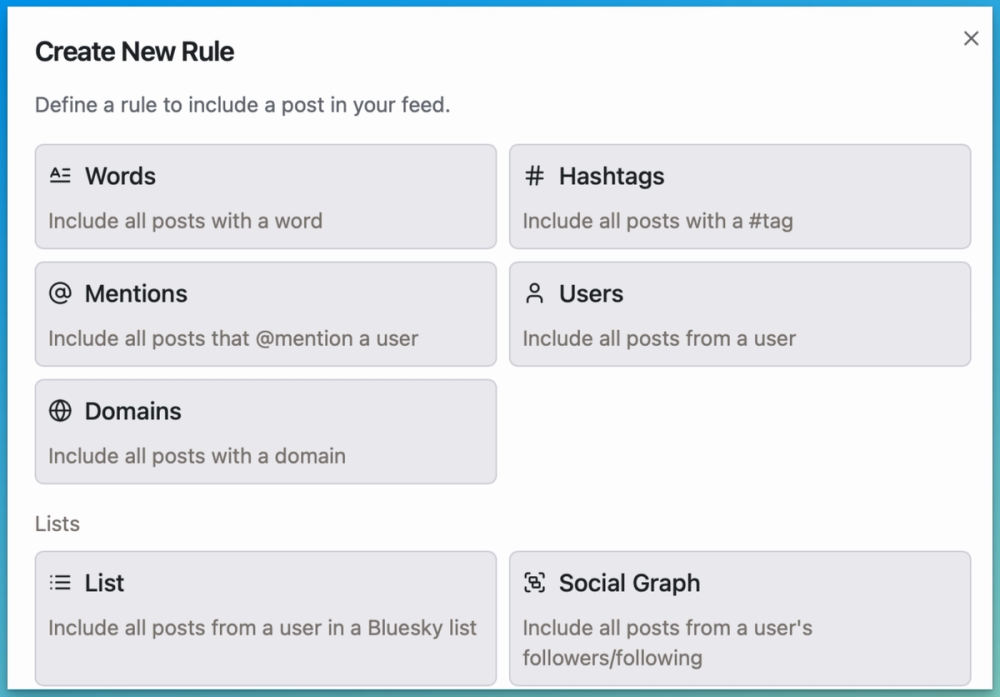
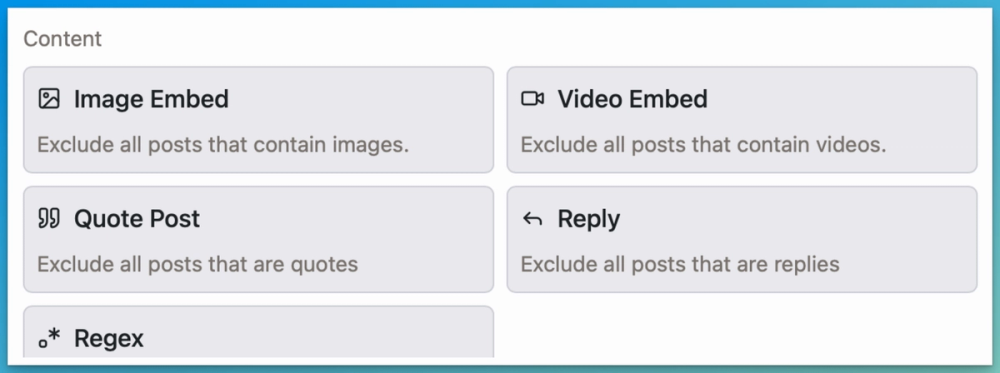
Similarly, we might want to exclude replies, or quote posts, or images:
And we have a whole guide on Nodes for Beginners.
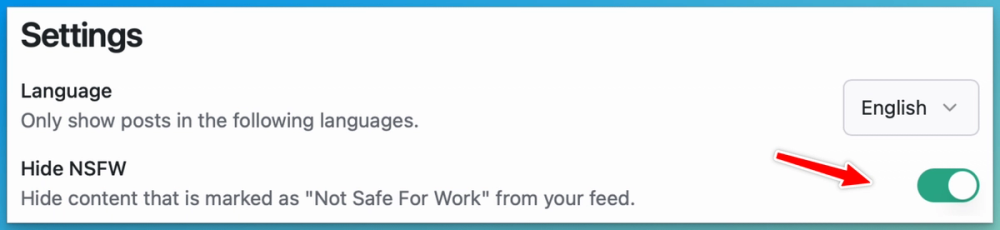
In the Simple Editor, you can toggle off NSFW content:
To do more comprehensive content moderation, or to test and debug your feed, you'll need to switch to the Full Editor.
When you're ready to see your feed out in the world you can hit Publish.
The Full Editor
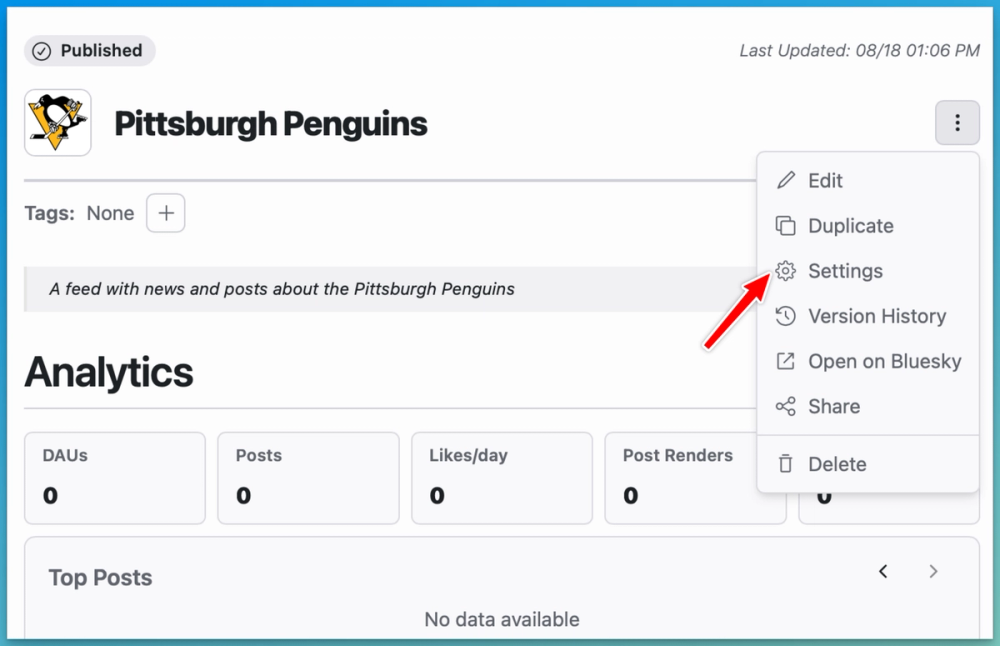
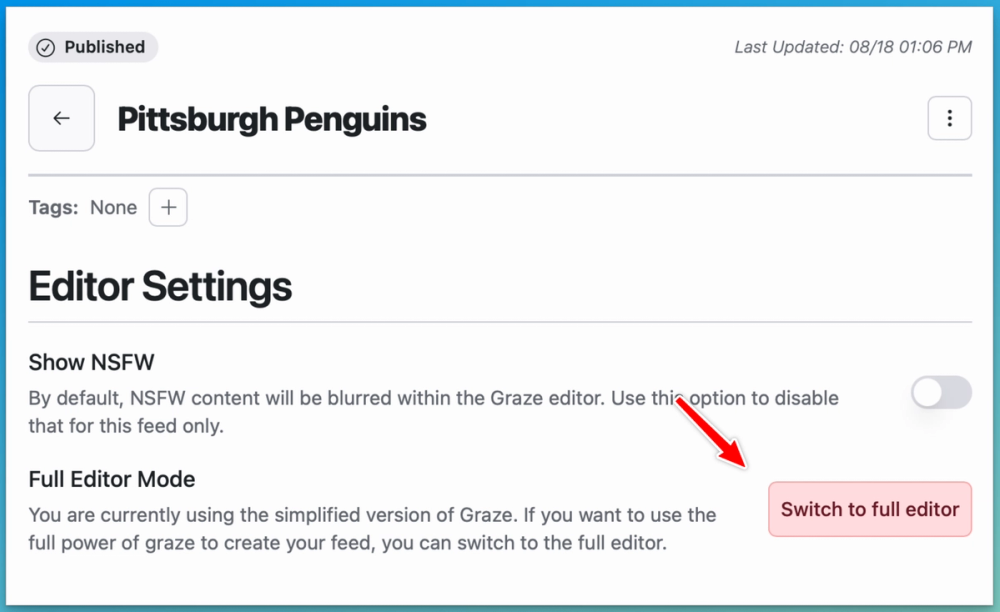
Once you're ready to try some more advanced editing, you can switch from the Simple Editor to the Full Editor. To do that, go into your Feed Settings:
And switch to the Full Editor:
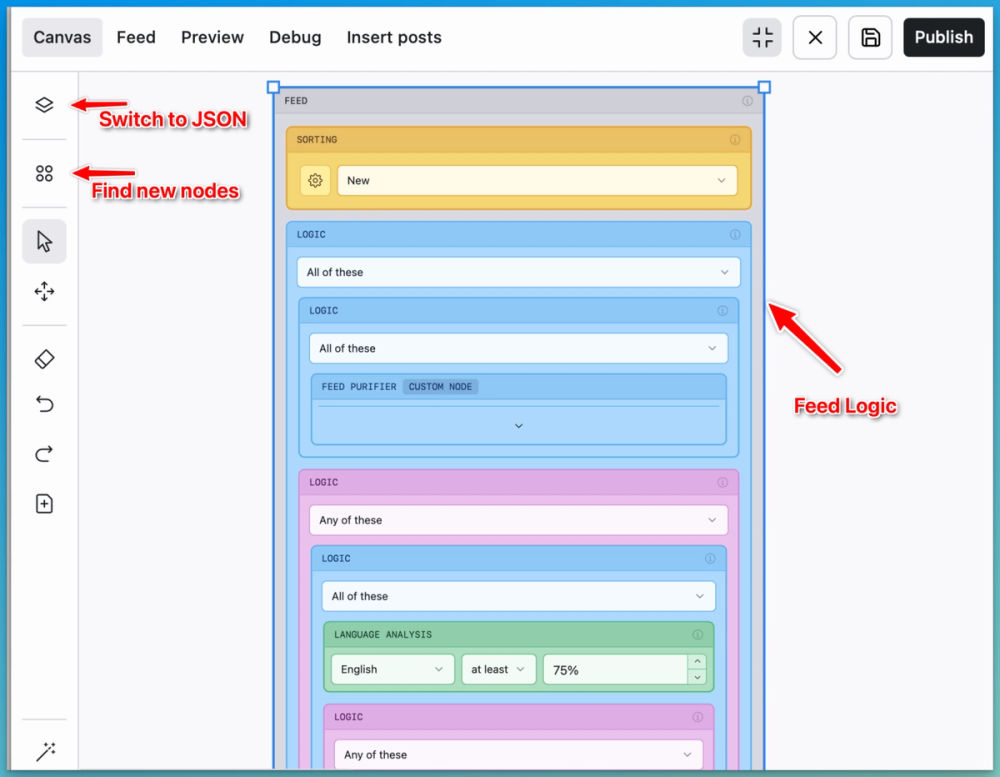
Note: if you're already familiar with JSON you can switch to the code version in the top corner. For the rest of us, let's carry on!
There are three parts to this we’re going to use. We’re going to edit the Feed description in the middle, telling it what we want to include and exclude, how we want our feed to sort itself, and how we want to moderate it. Using Debug at the top we’ll be able to test whether our recipe is perfect. And on the left, we will find our ingredients!
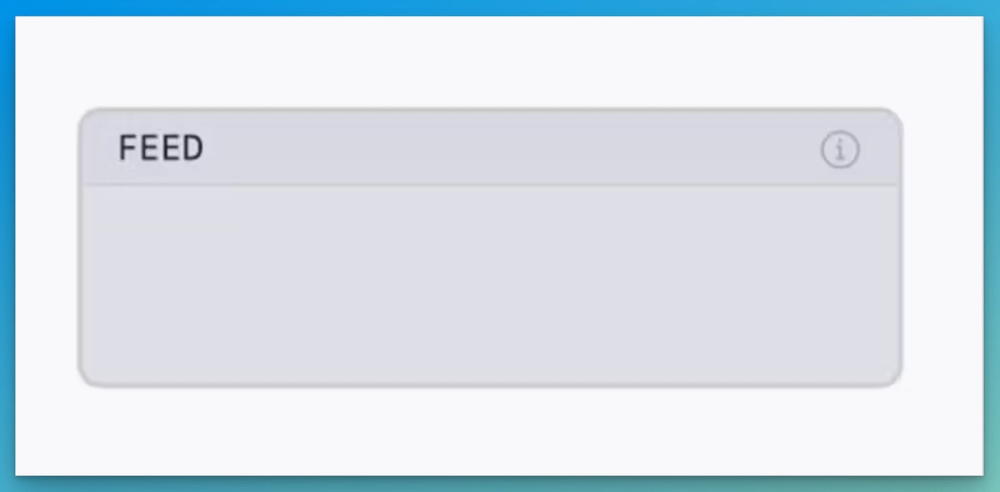
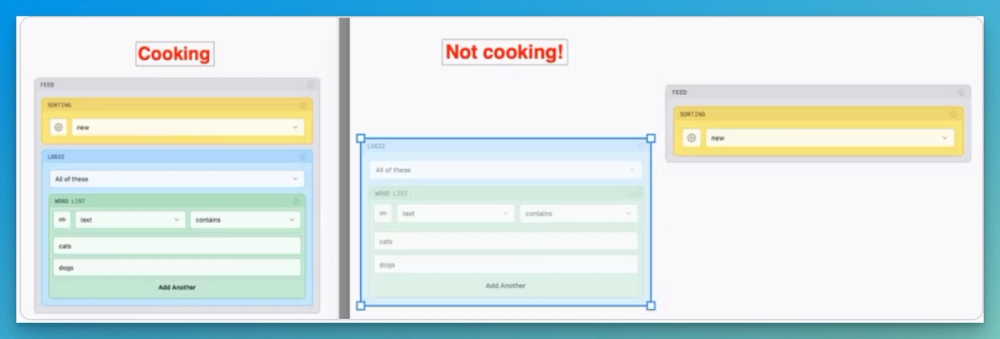
Let’s begin! Everything inside this grey Feed box is in our cooking pot:
You can drag your ingredients around on the canvas, but if they aren’t inside the box, they’re not in the recipe!
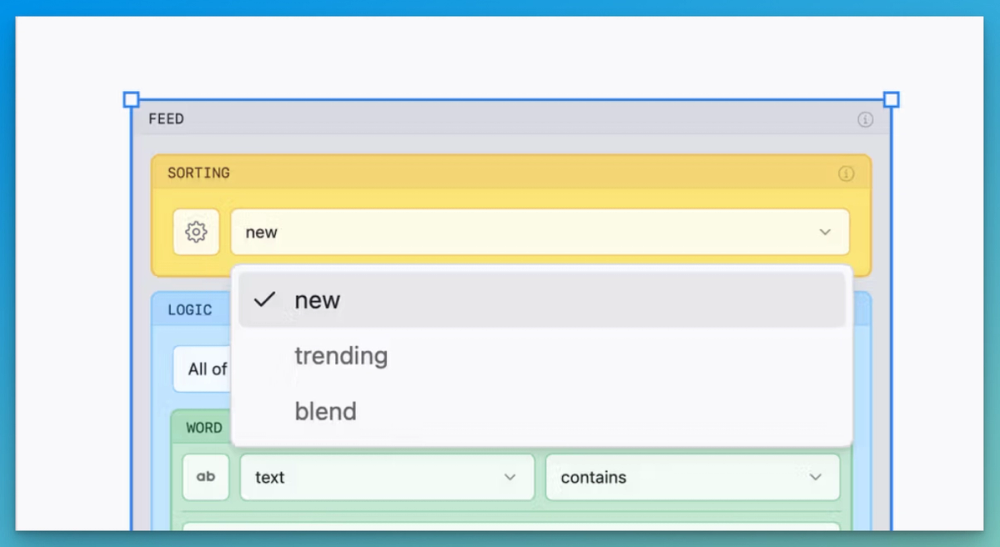
Sorting our feed
In the yellow box, choose how you’d like your feed to sort itself. New first? Trending? A mix? As a live sports feed, we’re going with “new” at the top. When you want to learn more about sorting you can read our guide to Custom Sorting.
Testing the feed
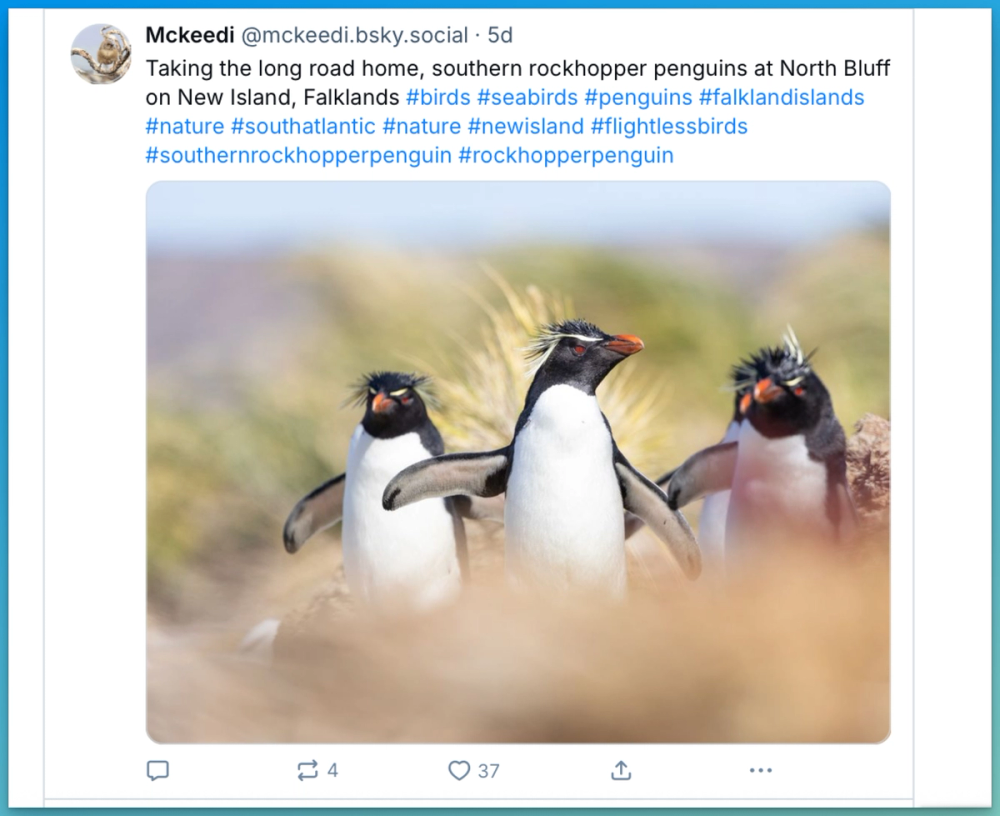
Now, one of the cool things we can do is test individual posts against our recipe. If we grab a post about actual penguins, and paste it into the test pad, we can find out if it would pass or fail our feed:
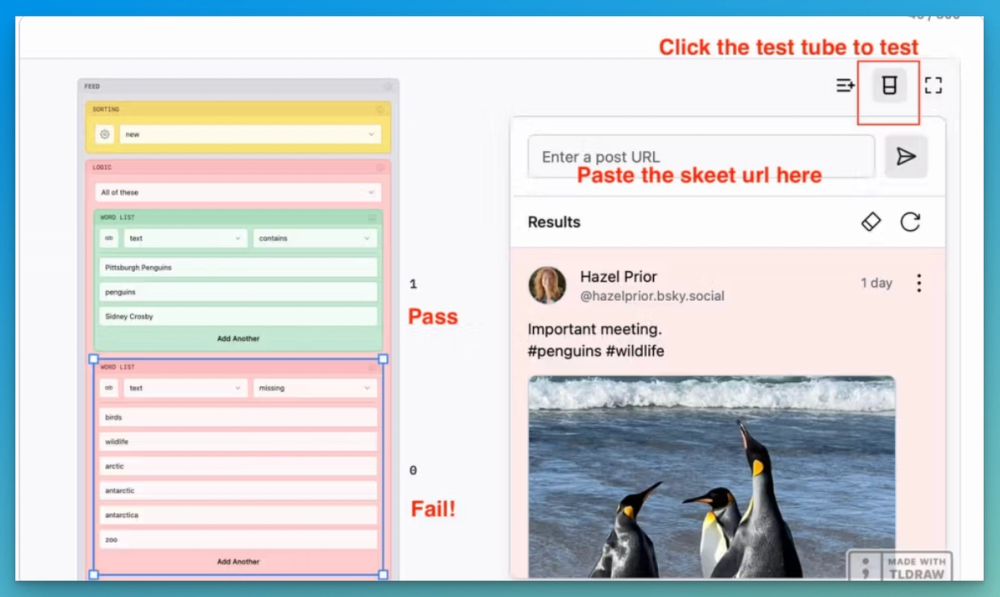
This fails because although it mentions penguins, it ALSO mentions wildlife, so it won’t make the feed! You can work on these inclusions and exclusions as much as you like to refine the feed so it shows exactly what you’re after. You can learn more in our guide to Testing and Fixing your Feed.
Content Moderation
Finally we can make some decisions about content by popping in nodes for Content Moderation, Image Moderation and Toxicity Analysis to make sure our feed is a vibrant, healthy place to hang out. Don't worry -- you don't have to learn how to do all of these things from scratch! Graze users have been making and sharing Custom Nodes that do all kinds of great things, and you can add any of those to your feed. Read all about creating and using Custom Nodes here.
Creating and Publishing our feed
Once you’re happy with your recipe and the tests you’ve run, you can click Save. Don’t panic, this doesn’t move the Feed to Bluesky yet, so you can just have it on your Dashboard in Graze and edit it until you’re really happy with it. And once you’d like to see it out in the world, hit Publish, and away you go!
You can find your published feed in your own profile in Bluesky, and from there you can share the link with others.
Once it's published, if you find that the feed behaviour isn't working quite the way you want it to over on Bluesky, check out our guide to Testing and Fixing Your Feed.
Manually Adding Posts
Your feed will start by backfilling the feed according to the logic you've set.
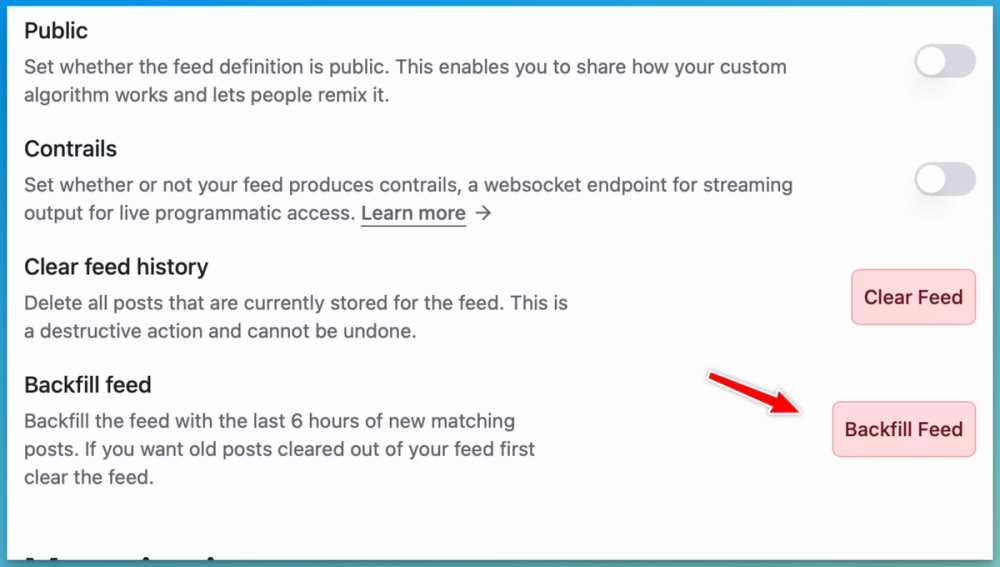
You may also want to Backfill your feed so that it has some content to get started. You can do this in your Feed Settings.
You may also want to manually add some specific posts. Once you've created your feed, you can click on the Add Posts to Feed button, and add posts by using their Bluesky url.
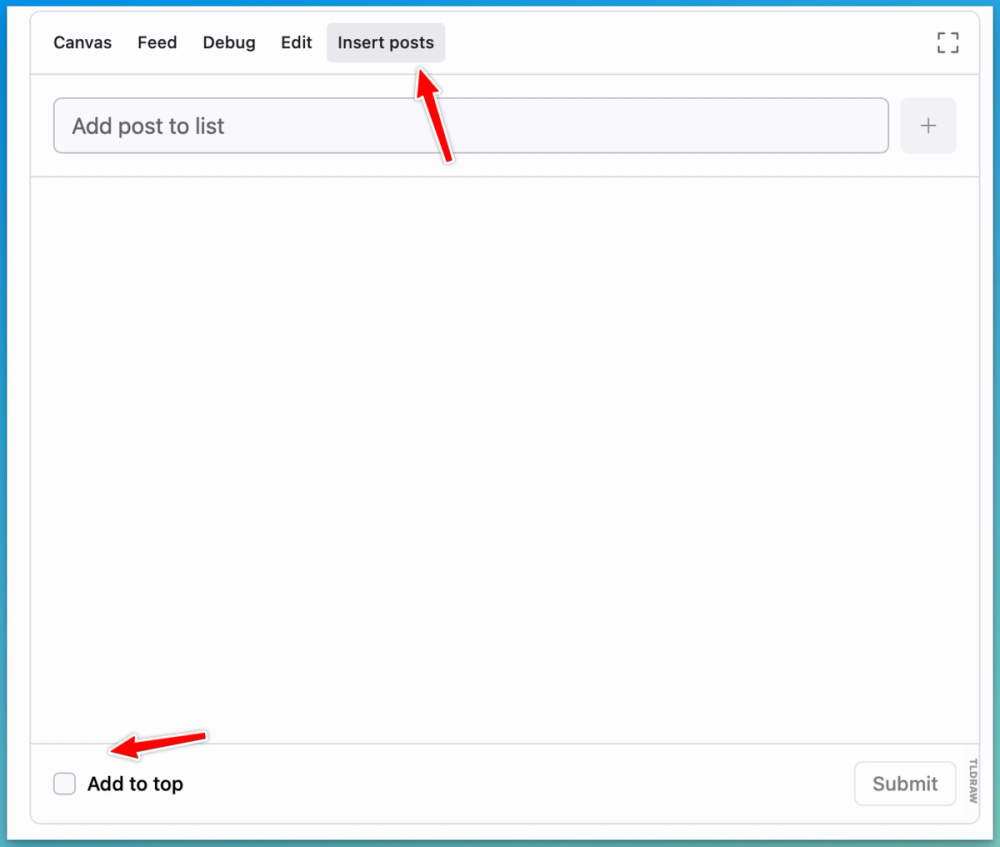
You can also elect to have these manually-added posts appear at the top of your feed if you're creating a feed from scratch. If you're adding posts because they should have appeared and did not, you can leave this box unticked and the posts will appear in the correct place chronologically.
More Help
If you need help, have questions, or just want to chat with us, come and join our Discord.